没有写全,省略了些我熟的一些东西,主要用来自我复习。
项目简介
项目可复制点
原本是一个基于Spring Boot1.5.19的商家后台小项目,不过其中也有几点以后复制的东西。
- 在登陆这一功能上使用了redis来做分布式Session进行集中管理。
- 由于商品数量少,缓存也是使用的redis,没有使用像Elasticsearch这样的全文检索库,如果量大可以使用。
- 对于分布式秒杀,也是通过redis来完成的,通过redis的setnx()和getset()这两个方法确保了数据的一致性,在性能上比synchronized关键字要高。
1 | /** |
加锁
主逻辑有那么点CAS算法的意思,可以把currentValue想象成一开始的值A,oldValue是需要我们读取去比较的值V,当且仅当V==A时,才返回true,否则就表明V的值已经被修改过了,这次过来的线程不能执行下面的操作,锁住了。这是我自己歪想的,不保证对。
解锁
只要判断值相等之后,删除redis中的key就好。
整体概述
项目可以分为商品、订单、买家、卖家这样四部分,买家可以登陆、下单、取消订单、查看订单详情等功能,卖家在后台在登陆之后可以,对商品进行上架、下架、添加、删除等一系列操作,对商品分类进行操作,也可以对订单进行完结、取消、详情等功能;整体用切面对用户登陆做了确认,也用原生websocket在创建订单时,能够在后台自动推送消息给卖家端等小功能。
目录结构如下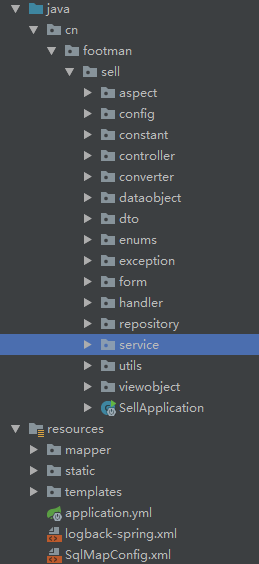
由于前期把项目都写在一起,过于冗余,尝试使用Spring Cloud将它拆成3个服务:订单、商品、用户。
Spring Cloud微服务化
首先确定版本,我使用的Spring Cloud是Greenwich.RELASE版,Spring Boot是2.1.3。
Eureka服务端
添加依赖
1 | <dependency> |
yml文件配置
Eureka Server相对比较简单,只需要在yaml文件中进行简单的配置就可以完成。Eureka Server作为服务注册功能的服务器,之后创建的服务都会注册到这个模块,客户端(Client)和服务端(Server)之间将会通过有周期的心跳确保连接。
服务端配置:1
2
3
4
5
6
7
8
9
10
11
12
13eureka:
client:
service-url:
defaultZone: http://localhost:8761/eureka/ #开发阶段就使用一个,http://localhost:8762/eureka/ #互相注册,就可以实现高可用
register-with-eureka: false
fetch-registry: false
server:
enable-self-preservation: false #自我保护模式,如果在短时间内丢失过多的客户端,那么这节点就会进入自我保护模式,不再删除
spring:
application:
name: eureka
#server:
# port: 8761 端口默认
在主类上添加EnableEurekaServer注解,即可启动。
服务端可以配置多个,通过互相注册就可以实现高可用。
Spring Cloud Config配置中心
添加依赖
在pom文件中需要添加config的依赖1
2
3
4<dependency>
<groupId>org.springframework.cloud</groupId>
<artifactId>spring-cloud-config-server</artifactId>
</dependency>
在主类上添加@EnableConfigServer就可以启动,确保已经配置Eureka的Client,在控制中心就可看到注册的CONFIG。
yml文件
配置中心的功能是可以把一些公共的配置,比如连接数据库的一些配置都放到这一部分,这样就可以为各个服务统一管理配置。
这次是把配置放到了gitlab上,当然也可以放到其他的地方,本地文件之类的。下面是具体配置文件1
2
3
4
5
6
7
8
9
10
11
12
13
14
15
16
17
18
19spring:
application:
name: config
cloud:
config:
server:
git:
uri: https://gitlab.com/kokioyao/config-repo.git
username: 填写gitlab账号
password: 密码
eureka:
client:
service-url:
defaultZone: http://localhost:8761/eureka/
management:
endpoints:
web:
exposure:
include: "*"#暴露所有接口,为了自动更新,暴露bus-refresh
访问路径
在启动CONFIG服务后,可以通过访问配置信息的URL来访问配置文件,下面是具体的访问路径。
/{application}/{profile}[/{label}]
/{application}-{profile}.yml
/{label}/{application}-{profile}.yml
/{application}-{profile}.properties
/{label}/{application}-{profile}.properties
Spring Cloud Bus自动刷新
在pom文件中加入bus组件1
2
3
4<dependency>
<groupId>org.springframework.cloud</groupId>
<artifactId>spring-cloud-starter-bus-amqp</artifactId>
</dependency>
在这个依赖中,包含了rabbitmq的依赖,所以还需要启动rabbitmq,在配置中暴露端口。
之后在git上的yml文件修改内容,可以不需要重启config,就可以直接看到修改后的内容。
自动刷新,并让其他服务接收到之后自动配置
在pom文件中也加入Spring Cloud Bus的依赖,并且加入config client的依赖。
1
2
3
4
5
6
7
8<dependency>
<groupId>org.springframework.cloud</groupId>
<artifactId>spring-cloud-starter-bus-amqp</artifactId>
</dependency>
<dependency>
<groupId>org.springframework.cloud</groupId>
<artifactId>spring-cloud-config-client</artifactId>
</dependency>在服务的yml文件中进行修改
1
2
3
4
5
6
7
8
9
10
11
12
13
14
15
16
17
18
19
20
21spring:
application:
name: order
cloud:
config:
discovery:
enabled: true
service-id: CONFIG
profile: dev
bus:
id: ${vcap.application.name:${spring.application.name:application}}:${vcap.application.instance_index:${spring.cloud.config.profile:${local.server.port:${server.port:0}}}}:${vcap.application.instance_id:${random.value}}
#上面的id是由于springcloud bus无法正确找到端口,所进行的修改
eureka:
client:
service-url:
defaultZone: http://localhost:8761/eureka/
management:
endpoints:
web:
exposure:
include: "*"在需要刷新的方法或者类上添加RefreshScope注解。类似如下,就可以拿到配置文件中book的name和page
gitlab上的yml文件(注意访问路径);比如写在order-dev的配置文件中,那么可以访问order服务来看变化。1
2
3book:
name: Harry Potter
page: 909
客户端order服务中的类
1
2
3
4
5
6
7
8
(prefix = "book")
public class BookConfig {
private String name;
private Integer page;
}
- 最后之后我们需要借助gitlab的Webhooks功能,来将配置重新刷入。注意:在gitlab上填写必须是外网的地址不可以写localhost(由外网指向本地)。
完成之后,在gitlab上修改内容,就可以直接在服务上看到所修改的内容。
Order、Product服务
feign服务调用
在两个服务都注册到eureka server中,并且由config server统一管理配置之后,开始服务之间的调用(订单调用商品服务)。
这里使用feign,来进行调用,feign是声明式REST客户端(伪RPC),采用了基于接口的注解,由于feign内部也是用ribbon,所以也支持负载均衡。
添加依赖
在pom文件中添加依赖(product的client模块和order的主服务模块)1
2
3
4<dependency>
<groupId>org.springframework.cloud</groupId>
<artifactId>spring-cloud-starter-openfeign</artifactId>
</dependency>
由于服务是分开开发的,所以在order所需要的接口也应该由product服务提供,所以在商品服务写一个client模块供order调用,将order所需要的接口写在这边。到时候打包到仓库,在order中导入依赖即可。
配置
在提供服务端 即product client端代码如下:1
2
3
4
5
6
7
8
9
10
11
12
13
14/**
* @author kokio
* @create 2019-03-07 16:45
*/
("product")//这里是声明调用哪个服务
public interface ProductClient {
("/product/listProducts")//调用的具体方法
List<ProductInfoOutput> listProducts(@RequestBody List<String> productIdList);
("/product/decreaseStock")
void descreaseStock(@RequestBody List<DecreaseStockInput> decreaseStockInputList);
}
在消费端 即order server端,需要在主类上添加1
(basePackages="cn.footman.product.client")//表示调用的接口的位置
注意,需要将product client打成包放到本地仓库,再在order server中导入依赖。
完成之后就可以直接@Autowired进来使用。
注意
如果order端无法拿到数据,而product端确实进行了对数据的select,那么应该在order端设置超时时间1
2
3
4
5
6feign:
client:
config:
default:
connectTimeout: 5000
ReadTimeout: 5000
Rabbitmq消息传输
在order端订阅product消息。当product有减库存等动作时,发送消息给order端,做相应的处理。
依赖
在product服务添加依赖,就可以直接在类中引入AmqpTemplate进行发送消息1
2
3
4<dependency>
<groupId>org.springframework.boot</groupId>
<artifactId>spring-boot-starter-amqp</artifactId>
</dependency>
在order中也加入相应的依赖,这里使用的是Spring Cloud Stream——为微服务应用构建消息驱动的框架,支持rabbitmq和kafka,可以简化对消息中间件的使用。1
2
3
4
5
6
7
8<dependency>
<groupId>org.springframework.cloud</groupId>
<artifactId>spring-cloud-starter-stream-rabbit</artifactId>
</dependency>
<dependency>
<groupId>org.springframework.cloud</groupId>
<artifactId>spring-cloud-stream</artifactId>
</dependency>
使用
直接在订阅端 添加一个RabbitListener注解就可以使用了。类似如下:1
2
3
4
5
6
7
8
9
10
11//1. @RabbitListener(queues = "myQueue")
//2.自动创建队列
//@RabbitListener(queuesToDeclare = @Queue("myQueue"))
//3.自动创建exchange和队列绑定
(bindings = (
value = ("myQueue"),
exchange = ("myExchange")
))
public void process(String message){
System.out.println(message);
}
Zuul服务网关
在微服务架构中,后端服务往往不直接开放给调用端,二十通过网管根据请求的url,路由到相应的服务。这样网关就可以在第三方调用端和服务提供方之间进行一些需要的过滤操作。因此可以这样认为:路由+过滤器=zuul。
依赖
在pom文件中添加依赖,网关服务需要注册到eureka server中,而且需要将配置放到config中,需要配置能够自动跟新。1
2
3
4
5
6
7
8
9
10
11
12
13
14
15
16<dependency>
<groupId>org.springframework.cloud</groupId>
<artifactId>spring-cloud-starter-config</artifactId>
</dependency>
<dependency>
<groupId>org.springframework.cloud</groupId>
<artifactId>spring-cloud-starter-netflix-eureka-client</artifactId>
</dependency>
<dependency>
<groupId>org.springframework.cloud</groupId>
<artifactId>spring-cloud-starter-netflix-zuul</artifactId>
</dependency>
<dependency>
      <groupId>org.springframework.cloud</groupId>
      <artifactId>spring-cloud-starter-bus-amqp</artifactId>
</dependency>
配置
yml文件中需要添加下面关于zuul的内容,由于使用config统一管理,这些内容应该被配置到gitlab上去。1
2
3
4
5
6
7
8
9
10
11
12
13
14
15zuul:
host:
connect-timeout-millis: 10000
socket-timeout-millis: 60000
routes: #实现路由功能 /服务名/访问路径
pro:
path: /prod/**
serviceId: product
#过滤敏感头部,下面设置就可以获取cookie
sensitive-headers:
# 可以写成下面这样(服务名,加路径)
# product: /prod/**
#使用正则排除访问路由,也可以排除服务ignored-service
# ignored-patterns:
# - /**/product/listProducts
要实现配置的自动刷新还需要新建一个下面的类1
2
3
4
5
6
7
8
9
10
11
12
13/**
* @author kokio
* @create 2019-03-10 17:07
*/
public class ZuulConfig {
//动态配置
(prefix = "zuul")
public ZuulProperties zuulProperties(){
return new ZuulProperties();
}
}
实现过滤
可以通过前置过滤器来进行对访问用户的权限控制,或者限流等等,举例文件如下,需要继承ZuulFilter。1
2
3
4
5
6
7
8
9
10
11
12
13
14
15
16
17
18
19
20
21
22
23
24
25
26
27
28
29
30
31
32
33
34
35
36
37
38
39
40
41
42
43
44/**
* @author kokio
* @create 2019-03-11 13:56
*/
public class AuthBuyerFilter extends ZuulFilter {
public String filterType() {
return FilterConstants.PRE_TYPE;
//前置,具体可以到类中进行选择
}
public int filterOrder() {
return FilterConstants.PRE_DECORATION_FILTER_ORDER - 1;
//值越小执行顺序越靠前
}
public boolean shouldFilter() {
RequestContext requestContext = RequestContext.getCurrentContext();
HttpServletRequest request = requestContext.getRequest();
if ("/order/order/create".equals(request.getRequestURI())) {
return true;
}
return false;
}
public Object run() throws ZuulException {
RequestContext requestContext = RequestContext.getCurrentContext();
HttpServletRequest request = requestContext.getRequest();
/**
* /order/creaete只能买家创建(cookie有openid)
*/
Cookie cookie = CookieUtil.getCookie(request, "openid");
if (cookie == null || cookie.getValue() == null) {
requestContext.setSendZuulResponse(false);//没有权限
requestContext.setResponseStatusCode(HttpStatus.UNAUTHORIZED.value());
}
return null;
}
}
跨域
实现跨域,可以通过在方法上添加@CrossOrigin()来对单个接口进行跨域
统一配置跨域接口,可以在Zuul中建一个CorsConfig类1
2
3
4
5
6
7
8
9
10
11
12
13
14
15
16
17
18
19
20
21
22
23
24
25
26
/**
* 跨域配置 处理跨域
* @author kokio
* @create 2019-03-11 14:20
* C-Cross O-Orign R-Resource S-Sharing
*/
public class CorsConfig {
public CorsFilter corsFilter(){
final UrlBasedCorsConfigurationSource source = new UrlBasedCorsConfigurationSource();
final CorsConfiguration config = new CorsConfiguration();
config.setAllowCredentials(true);//cookie
config.setAllowedOrigins(Arrays.asList("*"));//域名
config.setAllowedHeaders(Arrays.asList("*"));
config.setAllowedMethods(Arrays.asList("*"));//POST GET....
config.setMaxAge(9090l);
source.registerCorsConfiguration("/**",config);
return new CorsFilter(source);
}
}
Hystrix断路器
服务降级、服务熔断、服务限流、实时监控等等,防止出现服务雪崩效应。不能因为单个服务的出错,从而引起整个系统的崩溃。
依赖
1 | <dependency> |
第二个依赖是hystrix的监控面板
在主类上添加@EnableCircuitBreaker。
实现
简单实现代码1
2
3
4
5
6
7
8
9
10
11
12
13
14
15
16
17
18
19
20
21
22
23
24
25
26
27
28
29
30
31
32
33
34
35
36
37
38
39
40
41
42
43
44
45
/**
* @author kokio
* @create 2019-03-11 15:13
*/
(defaultFallback = "defaultFallback")
public class HystrixController {
// 超时配置
// @HystrixCommand(commandProperties = {
// @HystrixProperty(name = "execution.isolation.thread.timeoutInMilliseconds", value = "3000")
// })
//服务熔断
// @HystrixCommand(commandProperties = {
// @HystrixProperty(name="circuitBreaker.enabled",value = "true"),
// @HystrixProperty(name="circuitBreaker.requestVolumeThreshold",value = "10"),
// @HystrixProperty(name="circuitBreaker.sleepWindowInMilliseconds",value = "10000"),
// @HystrixProperty(name="circuitBreaker.errorThresholdPercentage",value = "50"),
//
// })
("/getProductInfoList")
public String getProductInfo(@RequestParam("num") Integer num) {
if(num % 2 == 0){
return "good";
}
RestTemplate restTemplate = new RestTemplate();
return restTemplate.postForObject("http://localhost:8090/product/listProducts", Arrays.asList("999999"), String.class);
//服务降级不单单是可以用到目标服务发生错误,不能提供降级,也可以在自身的服务中使用
// throw new RuntimeException("发生异常");
}
public String fallback() {
return "错误页面";
}
public String defaultFallback() {
return "默认错误页面";
}
}
sluth链路监控
此项目中服务较少,逻辑简单,但是真正系统项目在按业务功能划分之后,可能会产生很多服务,而当出现异常时,就比较难去判断哪个服务出现了问题,因此就需要Spring Cloud Sleuth,
它是Spring Cloud的组成部分之一,主要为SpringCloud应用实现了一种分布式追踪解决方案,其兼容了Zipkin, HTrace和log-based追踪,这里使用Zipkin进行简单演示。
依赖
1 | <dependency> |
配置
1 | spring: |
配置完成之后就可以登陆本地localhost:9411进行查看。
ZipKin的几个关键概念
traceId:跟踪的全局id
spanId:下一层的请求跟踪id
parentId:上一次请求跟踪id
总结
一个较为简单的小项目,使用了Spring Cloud的各个组件,能够较为快速的了解各自的应用方式及场景。